raspi:apache php-fpm(FastCGI Process Manager) と mysqlの設定変更


fpm(FastCGI Process Manager)を入れる前に、mysqlのメモリ設定を変更する。

vi /etc/mysql/my.cnf
#query_cache_limit       = 1M
query_cache_limit       = 12M

#query_cache_size        = 12M
query_cache_size        = 64M

service mysql restart
これ設定すると、エラーになるんだよな。書くファイルが間違ってるのかも。

apache apcに続いて、fpmをインストールする

a2enmod expires

service apache2 restart

vi /etc/apache2/apache2.conf
最終行に追加
# gzip setting
AddOutputFilterByType DEFLATE text/html text/plain text/css
AddOutputFilterByType DEFLATE text/javascript application/x-javascript application/javascript
BrowserMatch ^Mozilla/4 gzip-only-text/html
BrowserMatch ^Mozilla/4.0[678] no-gzip
BrowserMatch \bMSIE !no-gzip !gzip-only-text/html

# expire setting
ExpiresActive On
ExpiresDefault "access plus 1 year"

service apache2 restart

sudo apt-get install php7.0-fpm php7.0-mbstring

sudo vi +760 /etc/php/7.0/fpm/php.ini 
# 760行目の「;cgi.fix_pathinfo=1」をデフォルトから変更
cgi.fix_pathinfo=0

sudo /etc/init.d/php7.0-fpm restart

mbstringも有効に

a2enmod proxy_fcgi setenvif
a2enconf php7.0-fpm
/etc/php/7.0/fpm/pool.d/www.conf に記述があるか確認。無ければ追記する。
listen = /run/php/php7.0-fpm.sock

最後に、delfault-ssl.conf の VirtualHost内に追記する。

<FilesMatch "\.php$">
#SetHandler "proxy:fcgi://127.0.0.1:9000/"
SetHandler "proxy:unix:/run/php/php7.0-fpm.sock|fcgi://localhost"
</FilesMatch>

service apache2 restart

これで完了

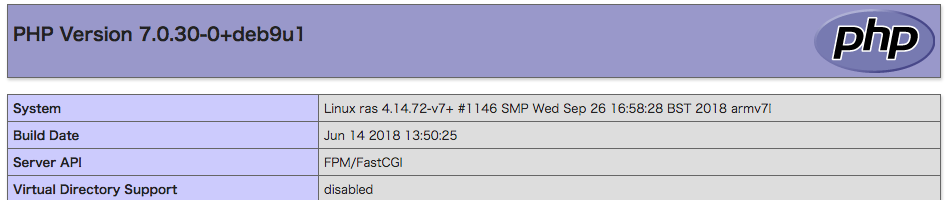
phpinfo()をみて、Server APIがFPM/FastCGI になっているのを確認

計測(https://tools.pingdom.com/)

ras.viasv.com www.club535.com
Server API apache2.0Handler FPM/FastCGI CGI/FastCGI
Performance grade  C77 C78  C77
Page size 395.0KB 395.5B 613.7KB
Load time 1.35s 1.20s 2.58s
Requests 42 41 63

raspi:apache APC(Alternative PHP Cache)を導入

手始めに、raspi-configでGPUメモリ使用量を減らす。X-Windowは使ってないので8MBでも多すぎるとおもうんだが。
ついでに、ほかのconfigも触っておこう

vi /boot/config
#arm_freq=800 3default
arm_freq=960
#i2cを有効にする
dtparam=i2c_arm=on
#gpu mem
gpu_mem=8

変更が終われば、再起動する。

reboot

再起動が終われば、
Alternative PHP Cacheをインストール

apt-get install php5-gd php-apc

これでOKっぽい。

Qnap Squid

TS-869にSquidをインストールして許可したDomainのみアクセス可能とする。

App CenterからSquidをインストール
設定画面でManual configurationに変更し、configを記載する。

### squid.conf ###
# The user name and group name Squid will operate as
cache_effective_user httpdusr
cache_effective_group everyone

#
# Recommended minimum configuration:
#
# Auth Method
#auth_param basic program /share/MD0_DATA/.qpkg/Squid/opt/libexec/squid/ncsa_auth /etc/shadow
#auth_param basic children 5
#auth_param basic realm Squid proxy-caching web server
#auth_param basic credentialsttl 2 hours

acl manager proto cache_object
acl localhost src 127.0.0.1/32 ::1
acl to_localhost dst 127.0.0.0/8 0.0.0.0/32 ::1

# Example rule allowing access from your local networks.
# Adapt to list your (internal) IP networks from where browsing
# should be allowed
acl localnet src 192.168.0.0/16
#acl homenet src 192.168.10.0/16

acl whitelist dstdomain "/share/MD0_DATA/.qpkg/Squid/whitelist"
#acl whitelist_regex url_regex "/share/MD0_DATA/.qpkg/Squid/whitelist_regex"

acl SSL_ports port 443
acl Safe_ports port 80		# http
acl Safe_ports port 21		# ftp
acl Safe_ports port 443		# https
acl Safe_ports port 70		# gopher
acl Safe_ports port 210		# wais
acl Safe_ports port 1025-65535	# unregistered ports
acl Safe_ports port 280		# http-mgmt
acl Safe_ports port 488		# gss-http
acl Safe_ports port 591		# filemaker
acl Safe_ports port 777		# multiling http
acl CONNECT method CONNECT

#acl ncsa_users proxy_auth REQUIRED

#
# Recommended minimum Access Permission configuration:
#
# Only allow cachemgr access from localhost
http_access allow manager localhost
http_access deny manager

acl noncache-servers dstdomain .tokyosteel.co.jp
no_cache deny noncache-servers

# Deny requests to certain unsafe ports
http_access deny !Safe_ports

# Deny CONNECT to other than secure SSL ports
http_access deny CONNECT !SSL_ports

# We strongly recommend the following be uncommented to protect innocent
# web applications running on the proxy server who think the only
# one who can access services on "localhost" is a local user
#http_access deny to_localhost

#
# INSERT YOUR OWN RULE(S) HERE TO ALLOW ACCESS FROM YOUR CLIENTS
#

# Example rule allowing access from your local networks.
# Adapt localnet in the ACL section to list your (internal) IP networks
# from where browsing should be allowed

http_access allow localnet whitelist
#http_access allow localnet homenet whitelist whitelist_regex
#http_access allow ncsa_users

# And finally deny all other access to this proxy
http_access deny all

# Squid normally listens to port 3128
http_port 3128

# We recommend you to use at least the following line.
hierarchy_stoplist cgi-bin ?

# Uncomment and adjust the following to add a disk cache directory.
#cache_dir ufs /share/MD0_DATA/.qpkg/Squid/opt/var/squid/cache 100 16 256

cache_mem 8 MB

# Leave coredumps in the first cache dir
coredump_dir /share/MD0_DATA/.qpkg/Squid/opt/var/squid/

access_log /share/MD0_DATA/.qpkg/Squid/opt/var/squid/logs/access.log squid
cache_log /share/MD0_DATA/.qpkg/Squid/opt/var/squid/logs/cache.log
cache_store_log /share/MD0_DATA/.qpkg/Squid/opt/var/squid/logs/store.log

# Add logfile rotated mechanism
logfile_rotate 7
debug_options rotate=1

#
mime_table /share/MD0_DATA/.qpkg/Squid/opt/etc/squid/mime.conf
pid_filename /share/MD0_DATA/.qpkg/Squid/opt/var/squid/run/squid.pid
diskd_program /share/MD0_DATA/.qpkg/Squid/opt/libexec/squid/diskd
unlinkd_program /share/MD0_DATA/.qpkg/Squid/opt/libexec/squid/unlinkd
icon_directory /share/MD0_DATA/.qpkg/Squid/opt/share/squid/icons
err_page_stylesheet /share/MD0_DATA/.qpkg/Squid/opt/etc/squid/errorpage.css
error_default_language en-us
error_directory /share/MD0_DATA/.qpkg/Squid/opt/share/squid/errors/ja
#error_directory /share/MD0_DATA/.qpkg/Squid/opt/share/squid/errors/en-us

# Add any of your own refresh_pattern entries above these.
refresh_pattern ^ftp:		1440	20%	10080
refresh_pattern ^gopher:	1440	0%	1440
refresh_pattern -i (/cgi-bin/|\?) 0	0%	0
refresh_pattern .		0	20%	4320

whitelistを記述する。
acl whitelist dstdomain “/share/MD0_DATA/.qpkg/Squid/whitelist”としているので、

### /share/MD0_DATA/.qpkg/Squid/whitelist ###
# White list
# government
.go.jp

# Evernote
.evernote.com

# Dell
.dell.com
.dell.co.jp
.dellcdn.com

# 電子マニフェスト
.jars.gr.jp
.jwnet.or.jp
.jwnetweb.jp
ocsp.digicert.com
crl.globalsign.net

# 関西電力
.kepco.co.jp

#google
.gstatic.com
.googleusercontent.com
.googleapis.com
.google.com
.google.co.jp

# mozilla
.mozilla.org
.mozilla.jp

# windows update
.microsoft.com
.windowsupdate.com
.windows.com

みたいに書いていけばいいじゃないか。

raspi:denyhostsを導入

[code]
apt-get update
apt-get install denyhosts

vi /etc/denyhosts.conf
SYNC_SERVER = http://xmlrpc.denyhosts.net:9911

sudo service denyhosts restart

sudo tail -f /var/log/denyhosts
2018-09-29 11:11:42,383 – denyhosts : INFO Processing log file (/var/log/auth.log) from offset (102619)
2018-09-29 11:11:42,391 – denyhosts : INFO launching DenyHosts daemon (version 2.10)…
2018-09-29 11:11:42,398 – denyhosts : INFO DenyHost daemon is now running, pid: 13773
2018-09-29 11:11:42,401 – denyhosts : INFO send daemon process a TERM signal to terminate cleanly
2018-09-29 11:11:42,403 – denyhosts : INFO eg. kill -TERM 13773
2018-09-29 11:11:42,404 – denyhosts : INFO monitoring log: /var/log/auth.log
2018-09-29 11:11:42,406 – denyhosts : INFO sync_time: 3600
2018-09-29 11:11:42,407 – denyhosts : INFO purging of /etc/hosts.deny is disabled
2018-09-29 11:11:42,408 – denyhosts : INFO sync_time: : 3600
2018-09-29 11:11:42,409 – denyhosts : INFO sync_sleep_ratio: 120
[code]

参考)

【DenyHosts】自動で攻撃者の IP アドレスを拒否リストに登録する設定を試しましたの♪★シンクロナイゼーション・モード★

QNAP UPS + VMware ESXi

先の記事でQNAPにUPSを接続し、QNAPのNUTでクライアントに商用電源の状態を送り、クライアントマシンをshutdownするまでの設定を行ったが、あと1台VMWare ESXiが稼働している。
このマシンにもshutdownの信号を受信できるよう少し調べてみたが、ssh経由でshutdownを行う感じで出来そうだ。

具体的には、QNAPのNUT SERVERからVMwareESXi上に展開したWindowsマシンでNUT CLIENTを建てて、商用電源の喪失信号を受けると、ShutdownScriptを走らせる。

upsmon.conf内のSHUTDOWNCMDを変更
OSのシャットダウンを行わず、ESXiにゲストの停止(/bin/shutdown.sh)とESXi自体の停止(poweroff)をSSHで実行すると良いそうだ。

#SHUTDOWNCMD “/sbin/shutdown -h +0”
SHUTDOWNCMD “/usr/bin/ssh root@ESXiのIP ‘/bin/shutdown.sh;/bin/poweroff’”

下記参考ページの構成と私の構成が異なっており、そのまま対応できない。
しかし、非常に参考になる。
参考ページのGuestOSはUbuntuを利用されているが、私の環境ではWindowsなので、WinNUTを使いGuestWindowsホストのupsmon.confにシャッドダウンコマンドにsshを足して設定すれば良さそうだ。
sshの設定は、参考ページと同じで良さそうだ。

upsmon.conf内のSHUTDOWNCMDを変更することでゲストOSのシャットダウンを行うのではなく、ESXiにゲストの停止(/bin/shutdown.sh)とESXi自体の停止(poweroff)をSSHで実行する。
#SHUTDOWNCMD “/sbin/shutdown -h +0”
SHUTDOWNCMD “/usr/bin/ssh root@ESXiのIP ‘/bin/shutdown.sh;/bin/poweroff'”

なお、これを動作させるためにはESXi上で以下の設定をしておく必要がある。
+ESXiへのSSHログインができるように設定しておく。~
→vSphere Clientからホストの[構成]-[セキュリティプロファイル]で[サービス]のプロパティを開きSSHを選んでオプションボタンを押す。「ホストに連携して開始および停止」を選んで開始ボタンを押した後、OKボタンを押す。
+nutを入れたサーバからのパスワードなしでコマンドを実行するために、SSHキーを登録する。~
→ESXiサーバの/etc/ssh/keys-root/authorized_keys にパブリックキーを登録する。
+ESXi 上でゲストOSの自動起動・停止を設定しておく。~
→vSphere Clientからホストの[構成]-ソフトウェア項目の[仮想マシン起動/シャットダウン]から自動起動設定を選ぶ。

VMwareESXiがGuestOSが何台か稼働中なので、間をみて設定しておくことにする。
参考)
https://lambeden.dyndns.org/wp/?p=83